
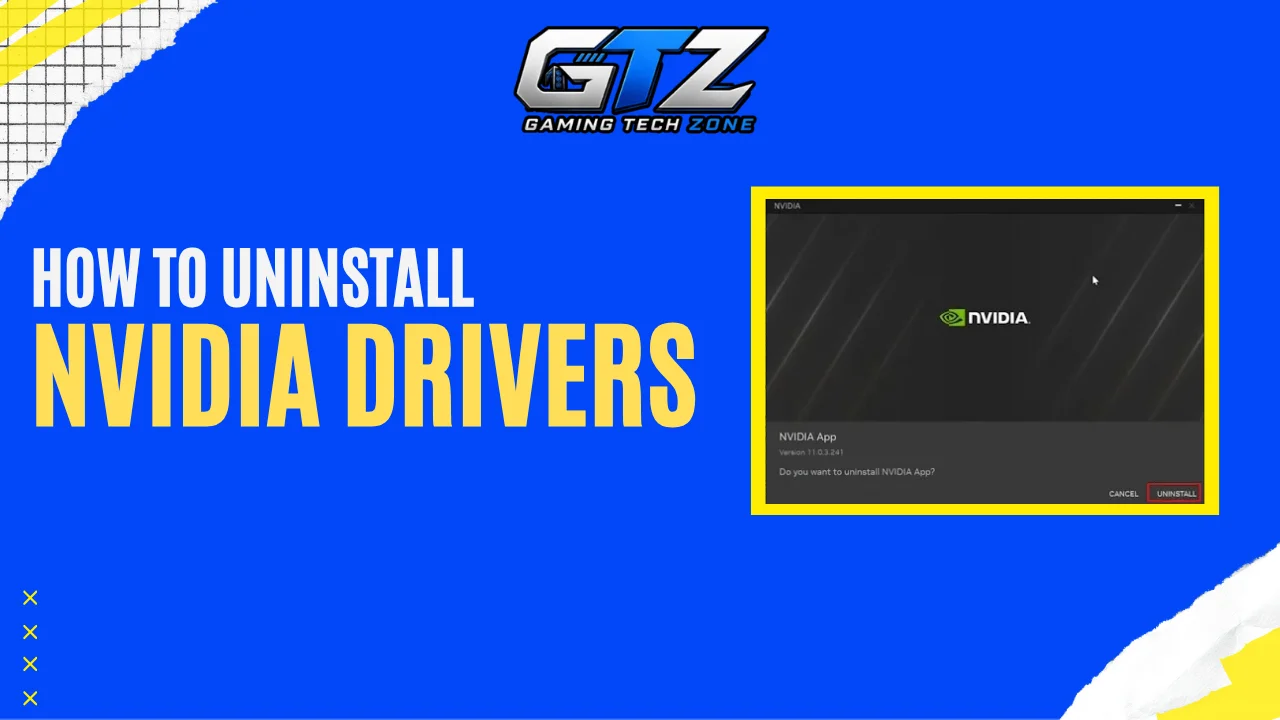
Do you want to know how to uninstall NVIDIA drivers from your Windows PC? It’s an easy process but can confuse some users.
When I first tried to uninstall my NVIDIA driver after facing graphics issues, I wasn’t sure if I should use Device Manager or another method. However, you don’t have to worry about this.
In this article, I will explain how to uninstall NVIDIA drivers using different methods in Windows. So, let’s start.
Key Takeaways
- Open Device Manager, expand Display adapters, and uninstall your NVIDIA graphics card.
- Open Windows Settings > Apps > Installed apps to remove the NVIDIA App and other NVIDIA software.
- Use PnPUtil to find and remove a specific NVIDIA driver package from Windows.
- Restart your PC after uninstalling the NVIDIA driver.
- Install a new NVIDIA driver if you need to use the graphics card again.
Why Uninstalling NVIDIA Drivers Can Be Confusing?
Uninstalling an NVIDIA driver may seem simple, but the process can become confusing when you are changing graphics hardware. For example, someone comparing AMD Radeon vs NVIDIA GeForce graphics cards may need to remove their current NVIDIA driver before switching to a different GPU.
Windows also provides more than one way to manage drivers. You can use Device Manager for a basic uninstall or PnPUtil when you need to remove the driver package from Windows.
Knowing what each method does can help you avoid removing the wrong software or leaving an old driver package behind.
How to Uninstall NVIDIA Drivers from Windows?
There are a few ways to remove NVIDIA drivers and related software from a Windows PC.
Device Manager provides the simplest way to uninstall the graphics driver, while PnPUtil lets you remove a specific driver package from Windows.
Windows Settings can also be used to remove NVIDIA software such as the NVIDIA App. What’s important to note here is that this process is similar for both gaming PCs and gaming laptops since Windows manages graphics drivers in the same way on both devices.
Method 1: Uninstall NVIDIA Drivers Using Device Manager
Device Manager is a built-in Windows tool for managing hardware and drivers. You can use it to uninstall your NVIDIA graphics device and, when the option is available, remove its driver software as well.
Follow these steps:
- Press Windows + X and select Device Manager.
- Expand Display adapters.
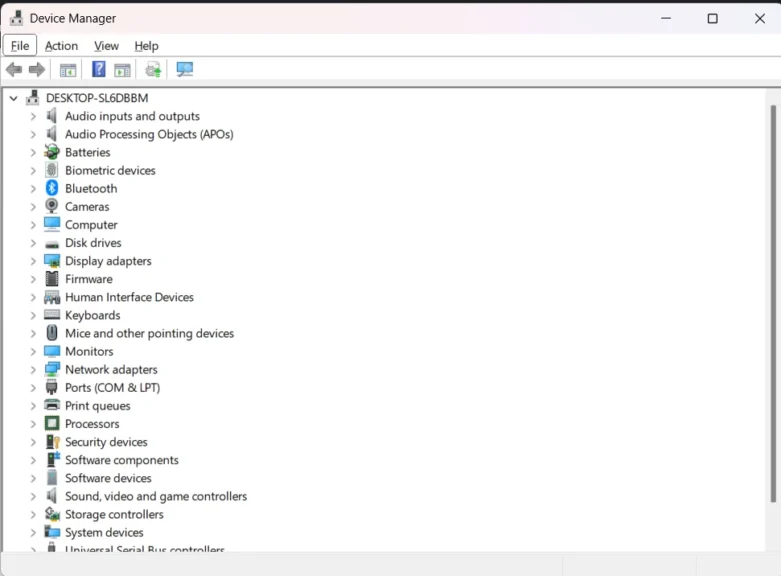
- Right-click your NVIDIA graphics card.
- Select Uninstall device.
- Check Attempt to remove the driver for this device if the option appears.
- Click Uninstall.
- Restart your PC.
You may need administrator access to remove the driver software. Windows can also reinstall a driver after the restart if it finds one available.
Method 2: Uninstall NVIDIA Software from Windows Settings
Windows 11, along with Windows 10, also lets you remove installed NVIDIA software through its Apps settings. This method is useful if you want to remove the NVIDIA App and other NVIDIA software along with the driver-related components.
The NVIDIA App is currently NVIDIA’s main software for managing GeForce drivers and related features.
Follow these steps:
- Press Windows + I to open Settings.
- Select Apps.
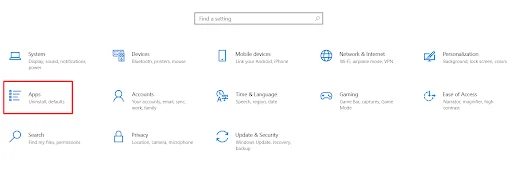
- Search for NVIDIA.
- Find the NVIDIA program you want to remove.
- Select Uninstall.
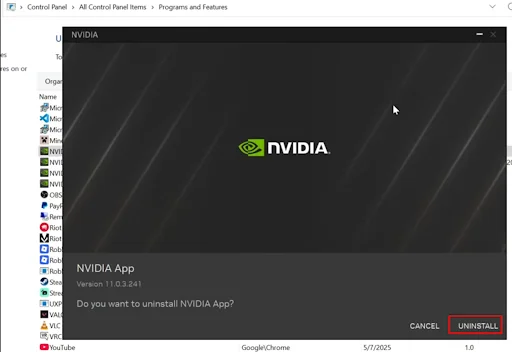
- Follow the instructions shown on screen.
- Restart your PC if Windows asks you to.
Keep in mind that removing the NVIDIA App does not necessarily remove the graphics driver itself. If your goal is to remove the display driver, use Device Manager or one of the more complete removal methods below.
Method 3: Remove the NVIDIA Driver Using PnPUtil
PnPUtil is a Windows command-line tool for managing driver packages. Unlike simply uninstalling a device, it can remove a driver package from the Windows Driver Store. This makes it a useful option when you want to remove a specific NVIDIA driver package more completely.
Follow these steps:
- Press the Windows key and search for Command Prompt.
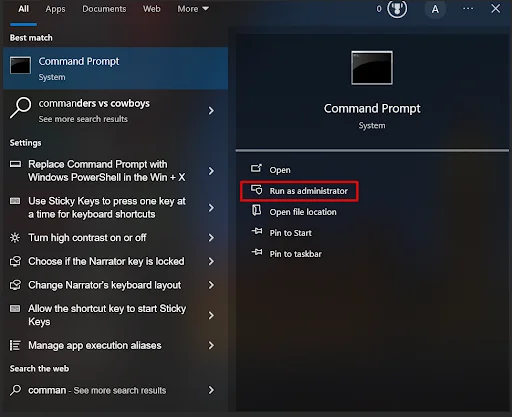
- Right-click Command Prompt and select Run as administrator.
- Type the following command and press Enter:
pnputil /enum-drivers
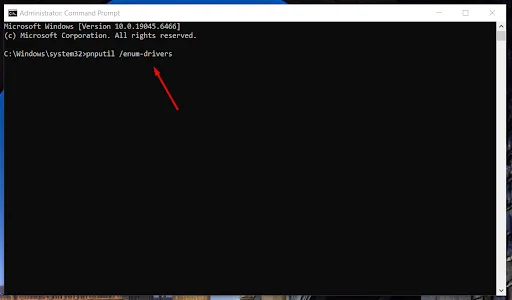
- Look through the list for the NVIDIA driver package.
- Note its Published Name, which usually looks like oem42.inf.
- Run the following command, replacing oem42.inf with your actual NVIDIA driver package:
pnputil /delete-driver oem42.inf /uninstall
- Wait for Windows to finish removing the driver package.
- Restart your PC.
Be careful when using PnPUtil. Make sure you identify the correct NVIDIA driver package before deleting it, as removing the wrong driver can cause hardware or system problems. Microsoft also recommends creating a system restore point before making driver changes.
How to Pick the Right Method for Uninstalling NVIDIA Drivers from Windows?
The right method depends on what you want to remove and why you are uninstalling the NVIDIA driver. Device Manager works well for a basic uninstall, while PnPUtil is useful when you need to remove the driver package from Windows.
- Device Manager: Use it for a simple way to uninstall the NVIDIA graphics driver.
- PnPUtil: This is useful for removing a specific NVIDIA driver package from the Windows Driver Store.
- Windows Settings: This works for removing NVIDIA software such as the NVIDIA App, but it does not remove the graphics driver itself.
Useful Tips for Uninstalling NVIDIA Drivers from Windows
A few simple steps can help you avoid problems when removing NVIDIA drivers from your Windows PC.
- Create a system restore point before uninstalling the driver.
- Download the NVIDIA driver you plan to install before removing the current one.
- Save your work and close running programs before starting the uninstall process.
- Make sure you select the correct NVIDIA graphics card in Device Manager.
- Do not remove other display or system drivers by mistake.
- Restart your PC after uninstalling the driver.
- Check your screen resolution after the restart, as Windows may temporarily use a basic display driver.
- If you are removing the driver to fix a problem, note the current driver version before uninstalling it.
Final Thoughts
Uninstalling NVIDIA drivers from Windows does not have to be difficult. Device Manager is a simple option for removing the graphics driver, while PnPUtil can remove a specific driver package from the Windows Driver Store.
Windows Settings can also help you remove NVIDIA software such as the NVIDIA App. Pick the method that matches your goal, follow the steps carefully, and restart your PC after the uninstall is complete.
People Also Ask
Yes, it is generally safe to uninstall NVIDIA drivers from Windows. Your PC can use a basic display driver until you install an NVIDIA driver again.
It is recommended to remove the old driver if you are replacing your graphics card with a different model. This can help avoid driver conflicts and graphics problems.
No, you do not always need to uninstall the current driver before reinstalling an NVIDIA driver. A clean uninstall can be useful if you are troubleshooting driver problems or want to start with a fresh installation.
Windows may switch to a basic display driver after the NVIDIA driver is removed. Your screen may also use a lower resolution until you install another graphics driver.
Yes, Windows may automatically install a compatible driver after you uninstall an NVIDIA driver. This can happen when Windows detects the graphics card and checks for available drivers.
